The Device Was Reset to Continue Sign in With a Google Account
"Verify your account. This device was reset. To continue sign in with a Google Account that was previously synced on this device. So now I can't use my phone because of this moronic anti-theft protection. I got this phone from a family member, and now neither of us can use it. What should I do?"
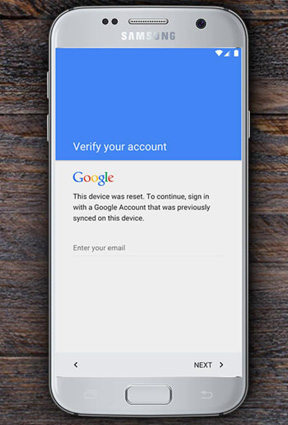
Are you facing the same problem, looking for this device was reset. To continue sign in with a Google Account bypass? If so, this article will be helpful for you.
- Part 1: Bypass Google Account after Resetting the Device
- Part 2: Remove FRP Lock on Samsung through PassFab Android Unlocker
- Part 3: FAQs About FRP(Factory Reset Protection)
Part 1: Bypass Google Account after Resetting the Device
Factory Reset Protection is set to protect your Android device from thieves, but it is very easy for users to get stuck on "Verify your account" page after factory reset. In the following, we will introduce how to get rid of that page.
- Case 1: This Device Was Reset. To Continue Sign in with a Google Account Bypass Samsung
- Case 2: This Device Was Reset. To Continue Sign in with a Google Account Bypass LG
Case 1: This Device Was Reset. To Continue Sign in with a Google Account Bypass Samsung
- Step 1: Select language and connect your device to network (usually a Wi-Fi).
- Step 2: Tap where it requires you to enter your email to let keyboard come up.
-
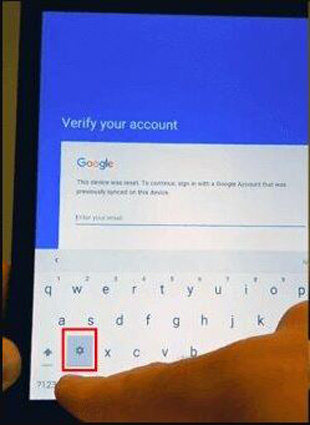
Step 3: In the keyboard, hold "@" character to get the settings menu.

-
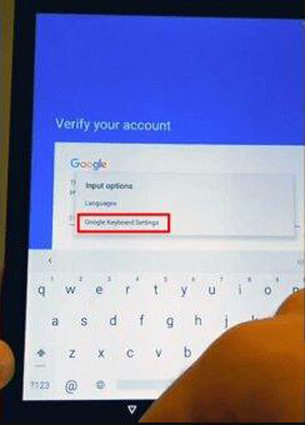
Step 4: Tap Google Keyboard Settings.

-
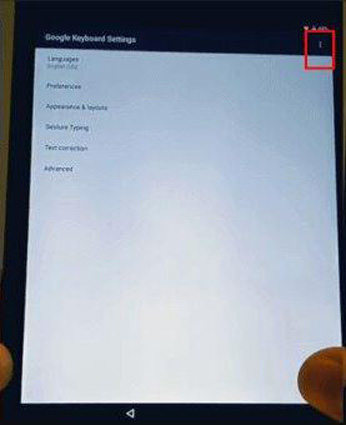
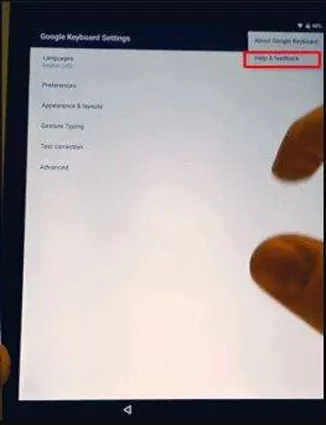
Step 5: Tap three dots in the top right corner of the screen.

-
Step 6: Choose Help & Feedback.

-
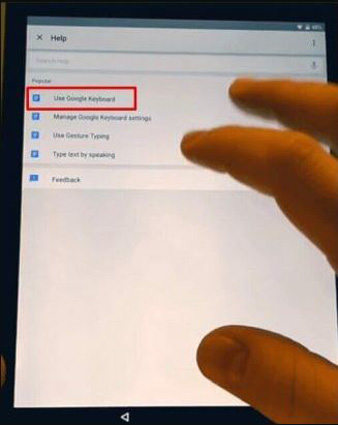
Step 7: Select Using Google Keyboard in the help menu.

-
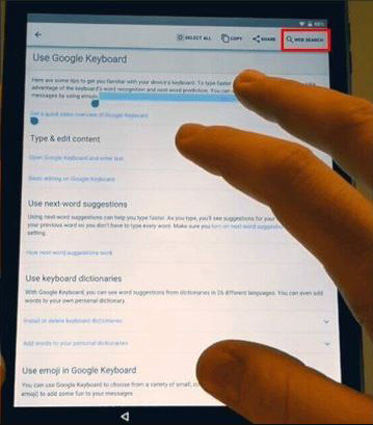
Step 8: Hold any text on this page to select it and tap the icon of web search.

-
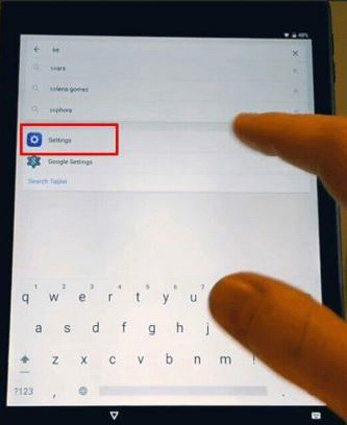
Step 9: Below search box, tap Settings.

- Step 10: Scroll down the menu and select About Phone.
- Step 11: Find Build Number in the menu and repeat taping it for 7 times to enable Developer Options.
- Step 12: Go back to the menu and select Developer Options.
- Step 13: Enable OEM Unlocking and tap Back twice.
- Step 14: Restart your device and reconnect it to the network.
Now, you have bypassed this device was reset to continue sign in with a Google account. You cam start your device and add a new Google account!
Read Also: Efficient Way for Samsung Galaxy S7 Remove Google Account Lock
Case 2: This Device Was Reset. To Continue Sign in with a Google Account Bypass LG
- Step 1: Connect your device to a network (usually a Wi-Fi).
-
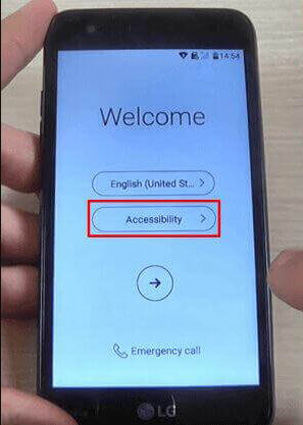
Step 2: Return to the Welcome screen and select Accessibility.

-
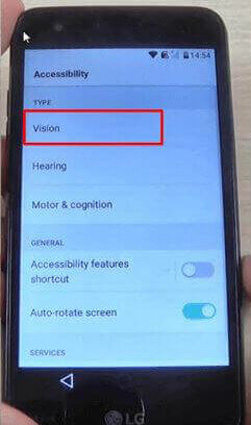
Step 3: Select Vision in the Accessibility menu.

-
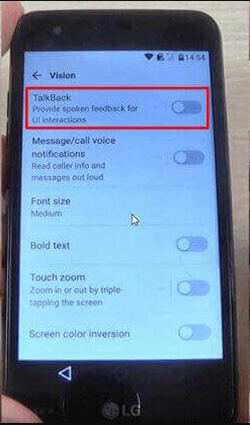
Step 4: Tap Talkback to enter the menu.

-
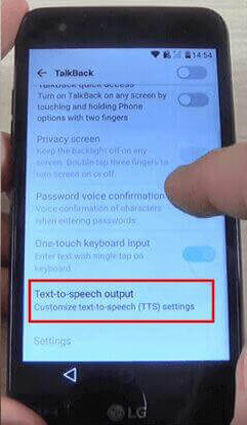
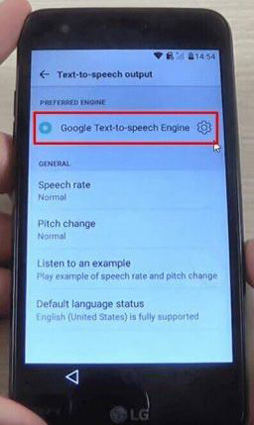
Step 5: Select Text-to-speech Output.

-
Step 6: Click the icon of settings in Google Text-to-speech Engine.

-
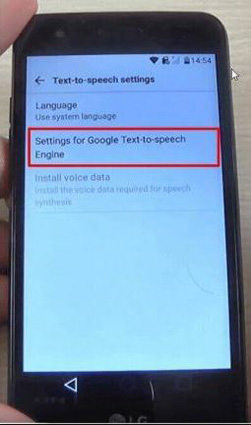
Step 7: Choose Setting for Google Text-to-speech Engine.

-
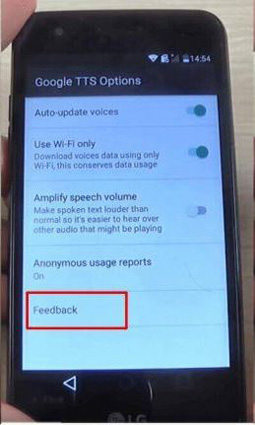
Step 8: Click Feedback in Google TTS Options.

-
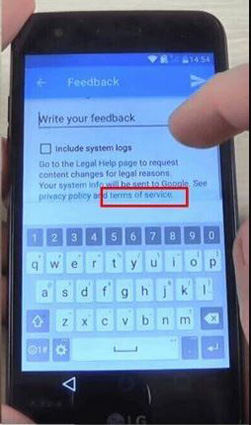
Step 9: Under where write your feedback, there is a paragraph. Click the last three words terms of service in the paragraph.

- Step 10: After that, there will be a Google Chrome window, when it asks you to sign in, select No, thanks.
- Step 11: Then you will enter the page of terms of service, click the logo of Google to for home page.
- Step 12: In the searching box, search for test.
-
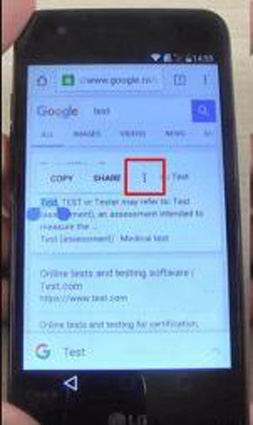
Step 13: There will show test from Wikipedia as the first result. Hold the word test in the description. Then there will pop up options, click three dots on the right side.

-
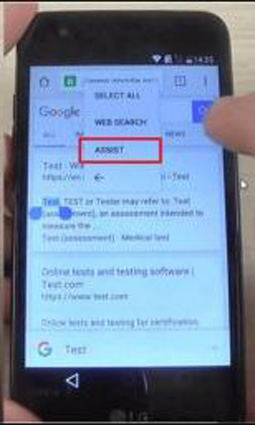
Step 14: Select Assist among three options.

- Step 15: Tap No, thanks when it asks you to sign in.
- Step 16: Search for settings through searching box and open it.
- Step 17: Select Apps in Settings.
-
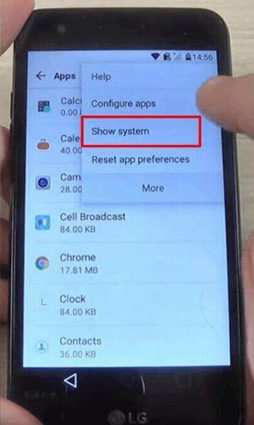
Step 18: Tap three dots at the right side, and choose Show system.

-
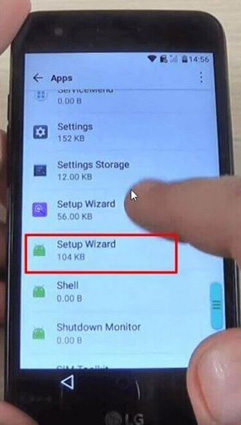
Step 19: Find Setup Wizard in the list and tap it.

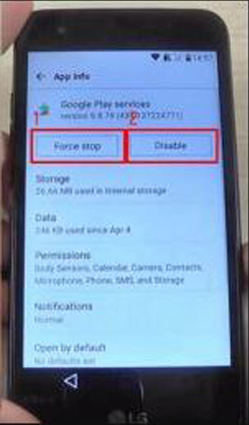
- Step 20: Click Force Stop.
- Step 21: Click Storage and you will see Clear Cache, click it.
- Step 22: Click the back key twice to return to Apps.
-
Step 23: Choose Google Play services, then repeat above steps: click Force Stop, OK and Disable.

- Step 24: Tap the back key to return to settings.
Restart your device and do not connect to network. Go to settings and select General, choose Backup & Reset. Then select Factory reset. Reset Phone and Delete all, then Reset. Now you bypass FRP lock successfully!
Part 2: Remove FRP Lock on Samsung through PassFab Android Unlocker
Bypass Google Account is a really troubling process. Here is an amazing tool, PassFab Android Unlocker, for you to remove FRP lock on Samsung. Just follow simple steps below.
- Step 1: Connect your device to the computer and launch PassFab Android Unlocker.
-
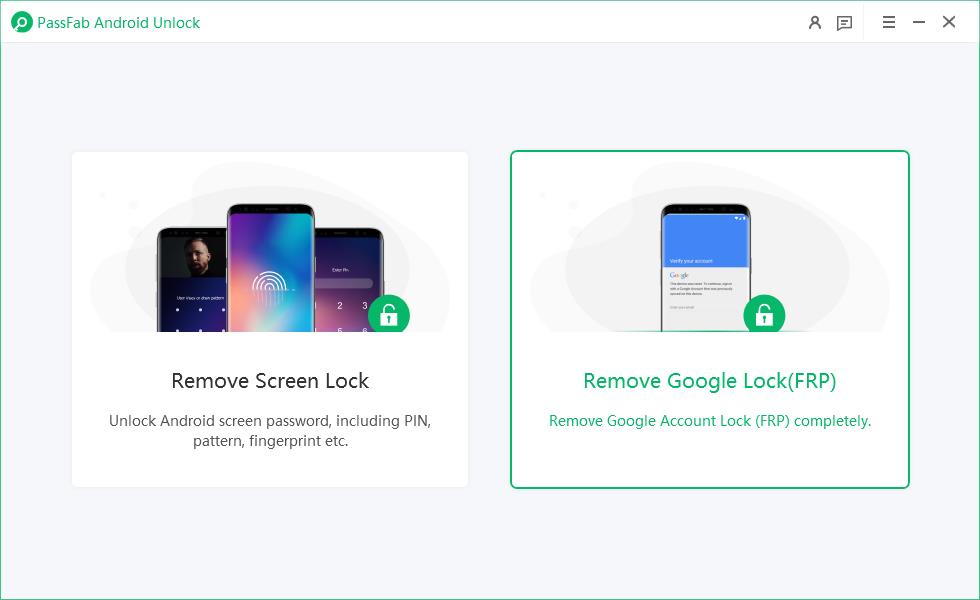
Step 2: Select Remove Google Lock(FRP).

-
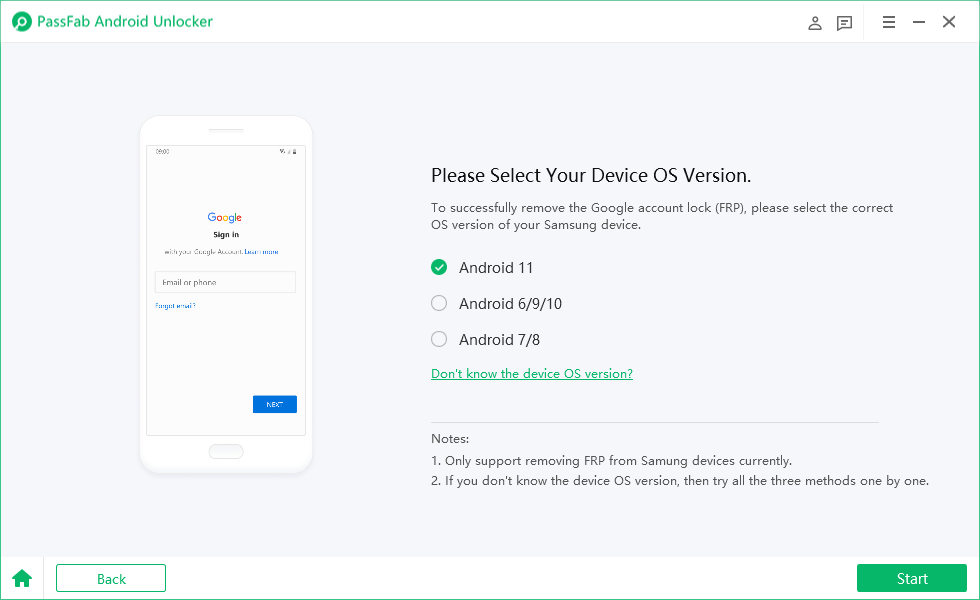
Step 3: Make sure your device has connected to Wi-Fi, and click "Start Remove".

-
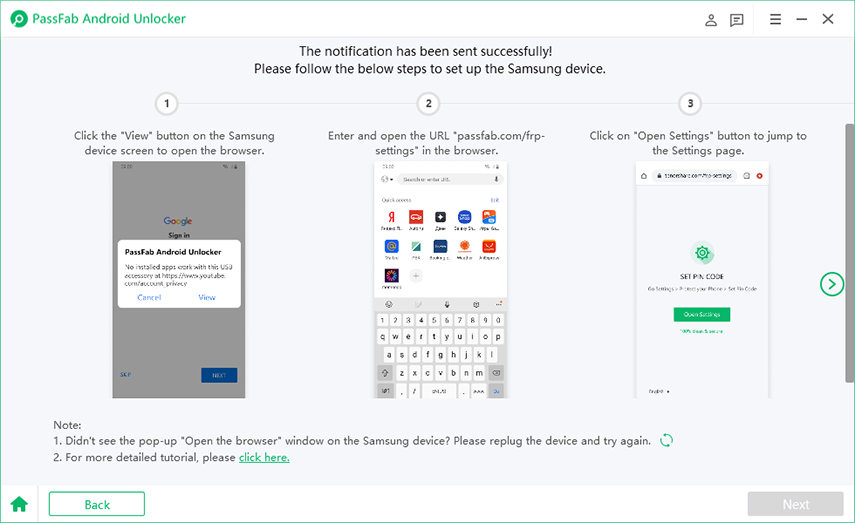
Step 4: PassFab Android Unlocker will send you a notification. Follow the guide to download the "BypassFrp.apk" file to remove FRP.

-
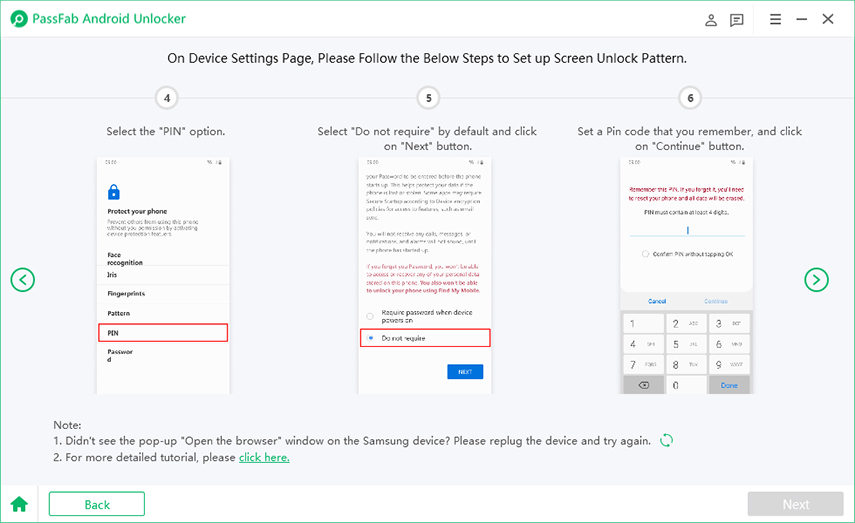
Step 5: Set up an unlock pattern from the Settings page.

-
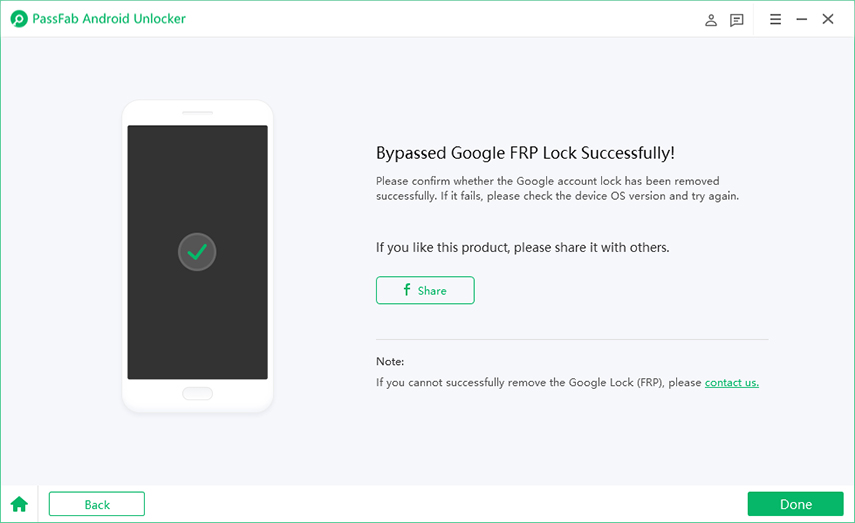
Step 6: Restart the device, and use the pattern to unlock the device and reset it.

Part 3: FAQs about FRP
Q1: How to disable FRP lock?
In the Settings, select Accounts. Then tap Google, and click your Google account to remove it. After removing Google account on your device, FRP lock is disabled.
Q2: Will flashing a phone remove FRP?
No, when you simply allow OEM unlock to flash your phone and do a factory reset, you are still required to sign in with a Google account that was previously synced on this device to activate it.
Q3: Will rooting a phone bypass FRP?
Simple rooting or unrooting has nothing to do with FRP. You still need to log in with your Google account.
To be frank, we offer how to remove previously synced Google account from Android from Samsung and LG. And we provide simple steps to remove Google FRP lock using Google lock removal. If you like this article, share it!
Source: https://www.passfab.com/android/device-reset-sign-in-google-account-previously-synced.html
0 Response to "The Device Was Reset to Continue Sign in With a Google Account"
Post a Comment